GraphQL Mutations
Working through the tutorial to this point gives you a working UI that you can use to query the sample data that you added, but doesn’t give you a UI to add new posts.
To add new posts, you’ll need to generate and use GraphQL Code Generator hooks for adding posts and layout the UI components so a user can enter the data.
GraphQL fragments
In this part of the tutorial, you’ll add the ability to add a post. That’s an
addPost mutation, and a GraphQL mutation can return data, just like a query.
In this case, it makes sense to have the addPost mutation return the same data
as the allPosts query, because the UI should adjust to insert the new post
into the home page’s post list. GraphQL has a nice mechanism called fragments
to allow this type of reuse.
In the previous section, you added the allPosts query like this:
query allPosts {
  queryPost(order: { desc: datePublished }) {
    id
    title
    tags
    datePublished
    category {
      id
      name
    }
    author {
      username
      displayName
      avatarImg
    }
    commentsAggregate {
      count
    }
  }
}
This can be easily changed to use a fragment by defining the body of the query
as a fragment and then using that in the query. You can do this by updating the
definition of allPosts in the src/components/operations.graphql file as
follows:
fragment postData on Post {
  id
  title
  text
  tags
  datePublished
  category {
    id
    name
  }
  author {
    username
    displayName
    avatarImg
  }
  commentsAggregate {
    count
  }
}

query allPosts {
  queryPost(order: { desc: datePublished }) {
    ...postData
  }
}
The syntax ...postData says “take the postData fragment and use it here”.
GraphQL mutations
With a fragment setup for the return data, the mutation to add a post can use exactly the same result data.
Add the following definition to src/components/operations.graphql to add the
mutation that lets users add a post:
mutation addPost($post: AddPostInput!) {
  addPost(input: [$post]) {
    post {
      ...postData
    }
  }
}
This mutation expects input data in the shape of the AddPostInput input type.
TypeScript, and GraphQL Code Generator will make sure you provide an input of
the correct type. This mutation returns data of the same shape as the allPosts
query; you’ll see why that’s important when using the Apollo cache.
Run the following command to tell the GraphQL Code Generator to generate a React
hook, useAddPostMutation, that extracts the component logic of this mutation
into a reusable function:
yarn run generate-types
The boilerplate to use a query is to use the query as part of loading the component, as in the following example:
const { data, loading, error } = useAllPostsQuery()

if (loading) { /* render loading indicator */ }

if (error) { /* handle error */ }

// layout using 'data'
However, mutations work differently. To use a mutation, you use the hook to create a function that actually runs the mutation and configure that with callback functions that execute after the mutation completes. Accordingly, the boilerplate for a mutation is as follows:
const [addPost] = useAddPostMutation({
    /* what happens after the mutation is executed */
})
With this syntax, calling addPost({ variables: ... }) executes the mutation
with the passed-in post data, and after the GraphQL mutation returns, the
callback functions are executed.
Apollo cache
As well as GraphQL support, the Apollo Client library also provides state management, using the Apollo Cache.
You can follow the flow of adding a new post, as follows: The user is on the
home (post list) page. There, they press a button to create a post, which brings
up a modal UI component (sometimes called a modal dialog) to enter the post
data. The user fills in the details of the post, and then the mutation is
submitted when they press Submit. This results in a new post, but how does
that new post get into the list of posts? One option is to force a reload of
the whole page, but that’ll force all
components to reload and probably won’t be a great user experience. Another
option is to just force reloading of the allPosts query, as follows:
const [addPost] = useAddPostMutation({
    refetchQueries: [ { query: /* ... allPosts ... */ } ],
})
This would work, but still requires two round-trips from the UI to the server to complete:
- Clicking Submit on the new post sends data to the server, and the UI waits for that to complete (one round trip)
- This then triggers execution of the
allPostsquery to execute (a second round trip)
When the allPosts query is re-executed, it changes the data value of
const { data, loading, error } = useAllPostsQuery() in the post list component,
and React re-renders that component.
Again, this works, but it could be more efficient: The UI actually already has
all of the data it needs to render the updated UI after the first round trip,
because the new post on the server is only going to be the post that was added
by the mutation. So, to avoid a trip to the server, you can manually update
Apollo’s view of the result of the allPosts query and force the re-render,
without round-tripping to the server. That’s done by editing the cached value,
as follows:
  const [addPost] = useAddPostMutation({
    update(cache, { data }) {
      const existing = cache.readQuery<AllPostsQuery>({
        query: AllPostsDocument,
      })

      cache.writeQuery({
        query: AllPostsDocument,
        data: {
          queryPost: [
            ...(data?.addPost?.post ?? []),
            ...(existing?.queryPost ?? []),
          ],
        },
      })
    },
  })
That sets up the the addPost function to run the addPost mutation, and on
completion inserts the new post into the cache.
Layout for the mutation
All the logic for adding a post will be in the app header:
src/component/header.tsx.
This logic adds a button that shows a modal to add the post. The
visibility of the modal is controlled by React state, set up through the
useState hook, as follows:
const [createPost, setCreatePost] = useState(false)
...
<Button className="dgraph-btn mr-1" onClick={() => setCreatePost(true)}>
  Create Post
</Button>
The state for the the new post data is again controlled by React state. The modal gives the user input options to update that data, as follows:
  const [title, setTitle] = useState("")
  const [category, setCategory]: any = useState("")
  const [text, setText]: any = useState("")
  const [tags, setTags]: any = useState("")
Then, clicking submit in the modal closes it and calls a function that
collects together the state and calls the addPost function, as follows:
  const submitPost = () => {
    setCreatePost(false)
    const post = {
      text: text,
      title: title,
      tags: tags,
      category: { id: category },
      author: { username: "TestUser" },
      datePublished: new Date().toISOString(),
      comments: [],
    }
    addPost({ variables: { post: post } })
  }
The modal is now set up with a list of possible categories for the post
by first querying to find the existing categories and populating a dropdown from
that. With all of these changes, the src/component/header.tsx file looks as
follows:
import React, { useState } from "react"
import {
  Image,
  Modal,
  Form,
  Button,
  Dropdown,
  Loader,
  TextArea,
} from "semantic-ui-react"
import { Link } from "react-router-dom"
import {
  useAddPostMutation,
  AllPostsQuery,
  useCategoriesQuery,
  AllPostsDocument,
} from "./types/operations"

export function AppHeader() {
  const [createPost, setCreatePost] = useState(false)
  const [title, setTitle] = useState("")
  const [category, setCategory]: any = useState("")
  const [text, setText]: any = useState("")
  const [tags, setTags]: any = useState("")

  const {
    data: categoriesData,
    loading: categoriesLoading,
    error: categoriesError,
  } = useCategoriesQuery()

  const addPostButton = () => {
    if (categoriesLoading) {
      return <Loader active />
    } else if (categoriesError) {
      return <div>`Error! ${categoriesError.message}`</div>
    } else {
      return (
        <Button className="dgraph-btn mr-1" onClick={() => setCreatePost(true)}>
          Create Post
        </Button>
      )
    }
  }

  const categoriesOptions = categoriesData?.queryCategory?.map((category) => {
    return { key: category?.id, text: category?.name, value: category?.id }
  })

  const [addPost] = useAddPostMutation({
    update(cache, { data }) {
      const existing = cache.readQuery<AllPostsQuery>({
        query: AllPostsDocument,
      })

      cache.writeQuery({
        query: AllPostsDocument,
        data: {
          queryPost: [
            ...(data?.addPost?.post ?? []),
            ...(existing?.queryPost ?? []),
          ],
        },
      })
    },
  })

  const submitPost = () => {
    setCreatePost(false)
    const post = {
      text: text,
      title: title,
      tags: tags,
      category: { id: category },
      author: { username: "TestUser" },
      datePublished: new Date().toISOString(),
      comments: [],
    }
    addPost({ variables: { post: post } })
  }

  const showCreatePost = (
    <Modal
      onClose={() => setCreatePost(false)}
      onOpen={() => setCreatePost(true)}
      open={createPost}
    >
      <Modal.Header>Create Post</Modal.Header>
      <Modal.Content>
        <Modal.Description>
          <Form>
            <Form.Field>
              <label>Title</label>
              <input
                placeholder="Type title..."
                onChange={(e) => setTitle(e.target.value)}
              />
            </Form.Field>
            <Form.Field>
              <label>Category</label>
              <Dropdown
                placeholder="You must select a category to continue..."
                fluid
                search
                selection
                options={categoriesOptions}
                onChange={(e, data) => setCategory(data.value)}
              />
            </Form.Field>
            <Form.Field>
              <label>Tags (optional)</label>
              <input
                placeholder="Enter space separated tags..."
                onChange={(e) => setTags(e.target.value)}
              />
            </Form.Field>
            <Form.Field>
              <label>Your Message</label>
              <TextArea
                rows="3"
                placholder="Enter your message..."
                onChange={(e, data) => setText(data.value)}
              />
            </Form.Field>
          </Form>
        </Modal.Description>
      </Modal.Content>
      <Modal.Actions>
        <Button color="black" onClick={() => setCreatePost(false)}>
          Cancel
        </Button>
        <Button
          content="Submit"
          labelPosition="right"
          icon="checkmark"
          onClick={submitPost}
          positive
        />
      </Modal.Actions>
    </Modal>
  )

  return (
    <>
      {showCreatePost}
      <div className="ui clearing segment header-seg">
        <h3 className="ui right floated header header-seg-right">
          <span>{addPostButton()}</span>
        </h3>
        <h3 className="ui left floated header header-seg-left">
          <Link to="/">
            <div className="flex">
              <span>
                <Image size="tiny" src="/diggy.png" className="mr-5" />{" "}
              </span>
              <div>
                <p className="header-text">Dgraph</p>
                <p className="t-size">DISCUSS</p>
              </div>
            </div>
          </Link>
        </h3>
      </div>
    </>
  )
}
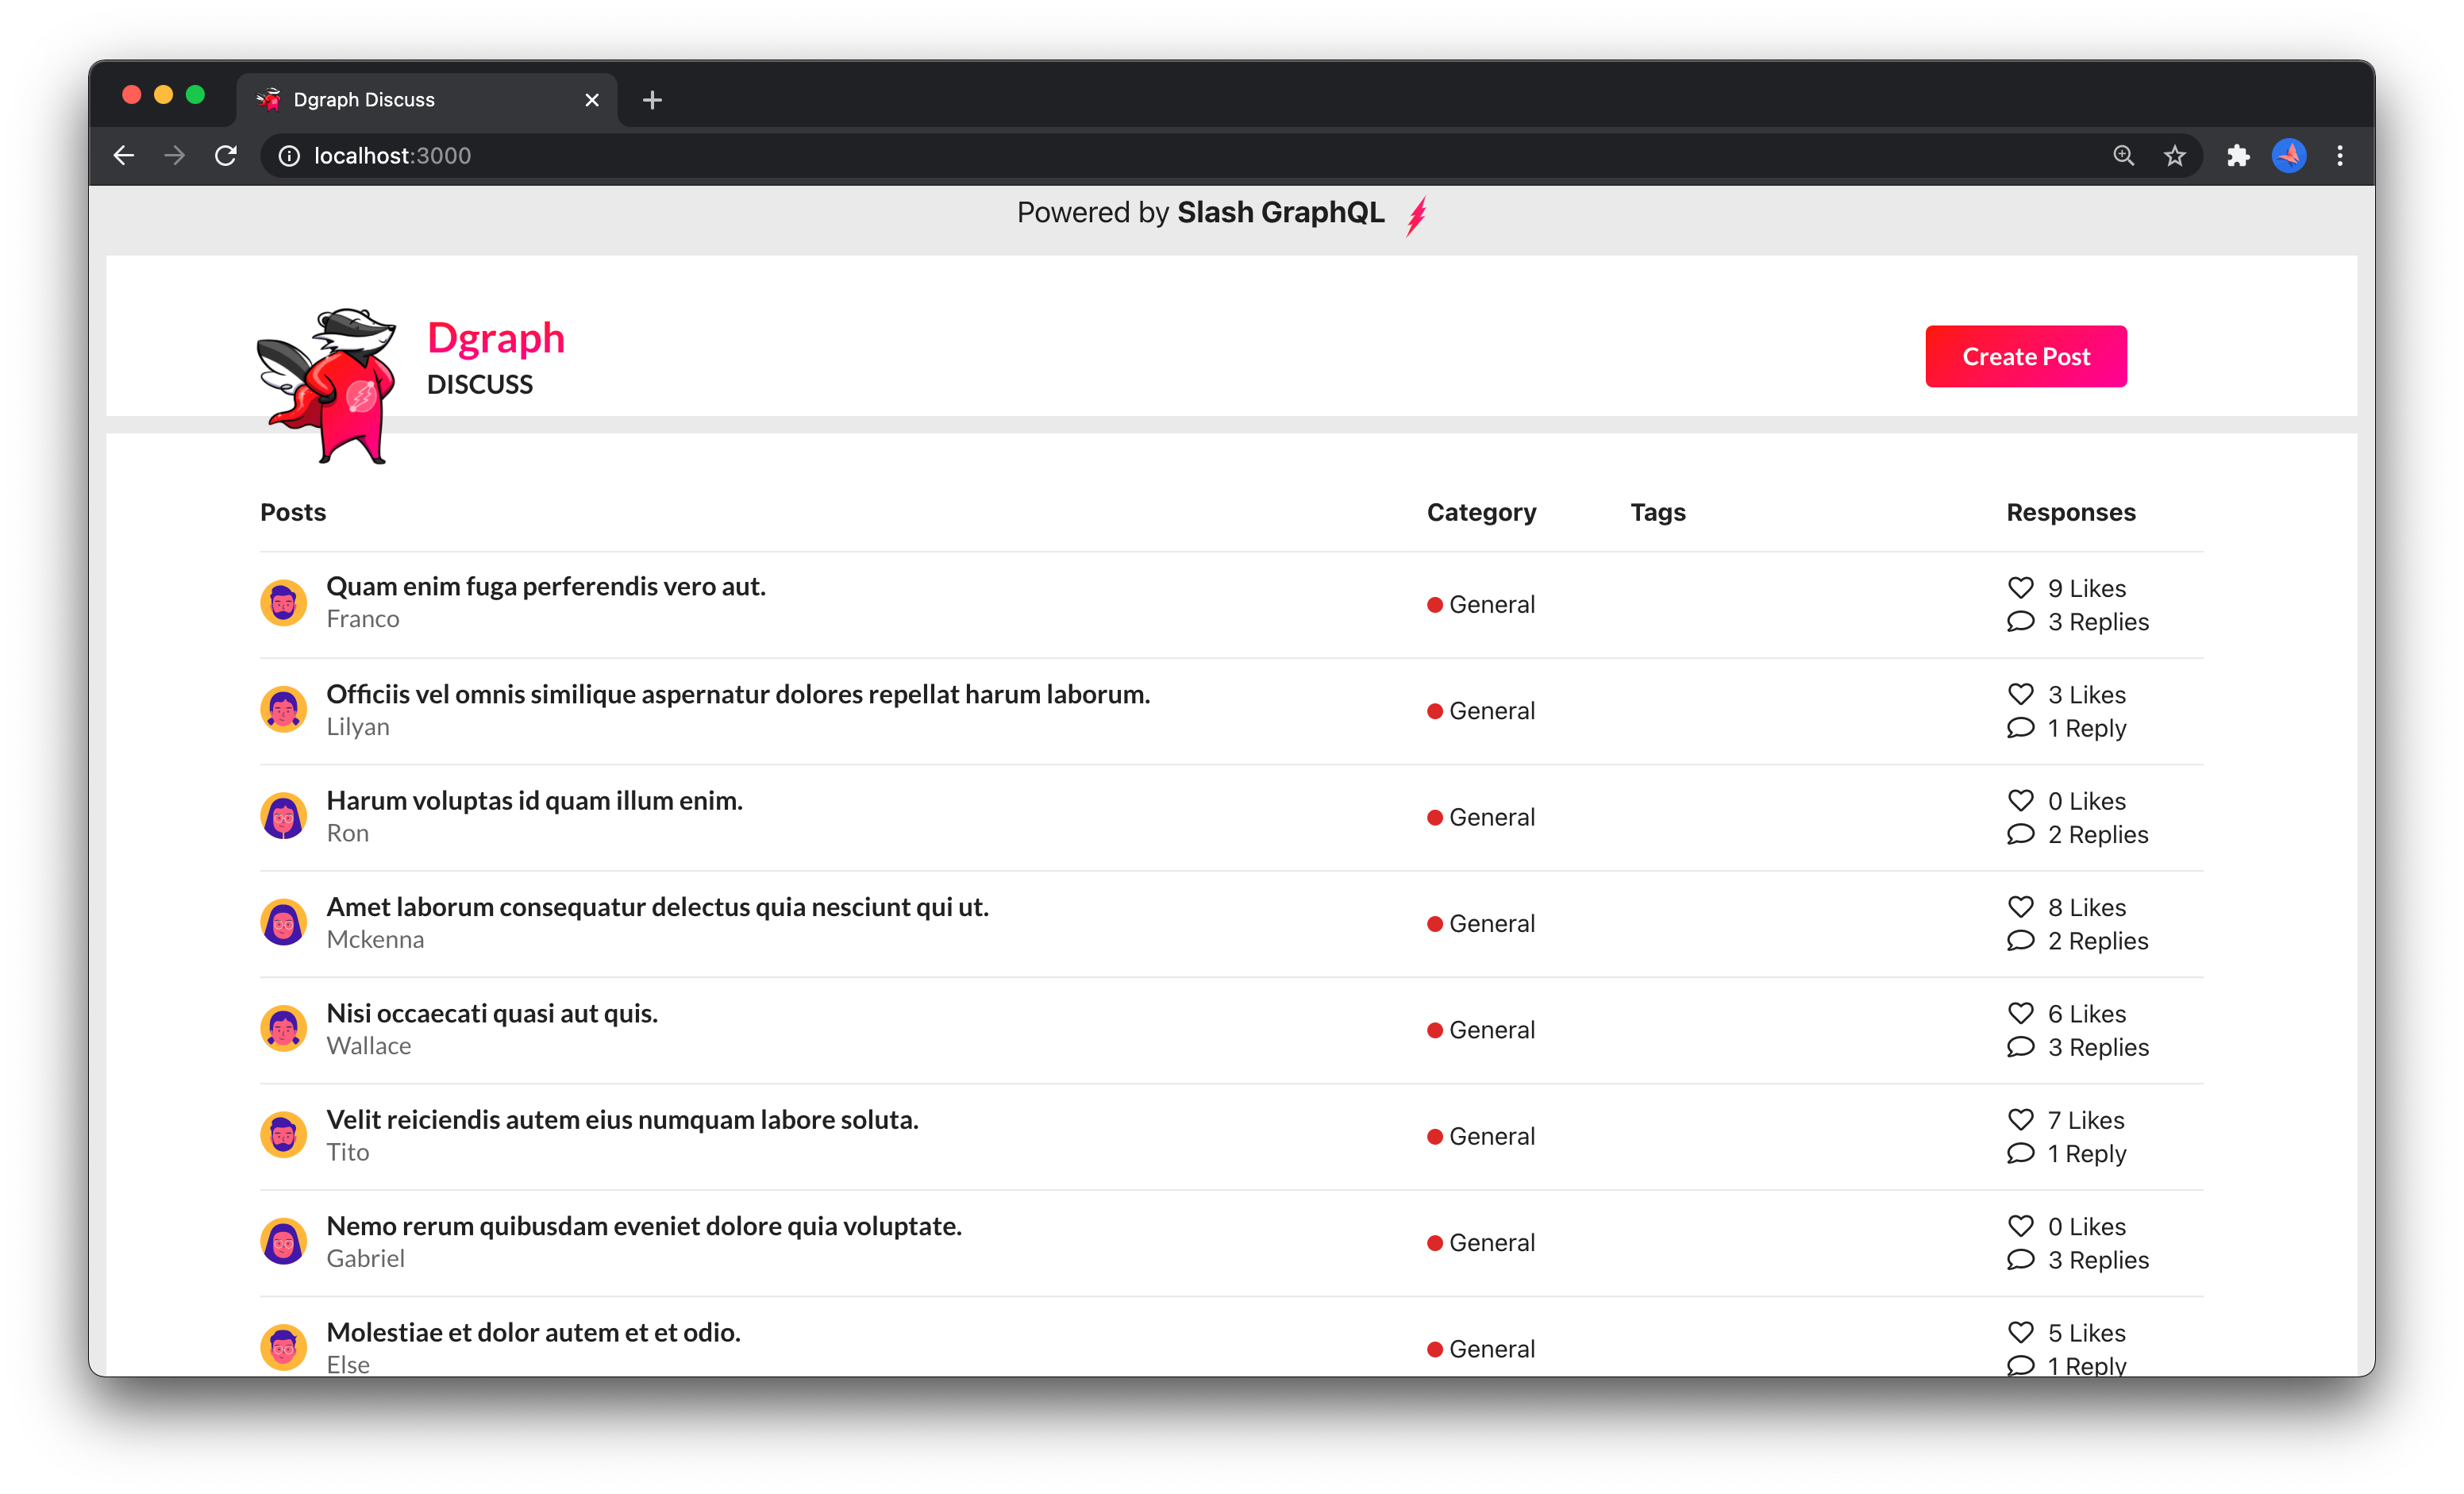
All of this adds a Create Post button to the header, along with supporting logic:

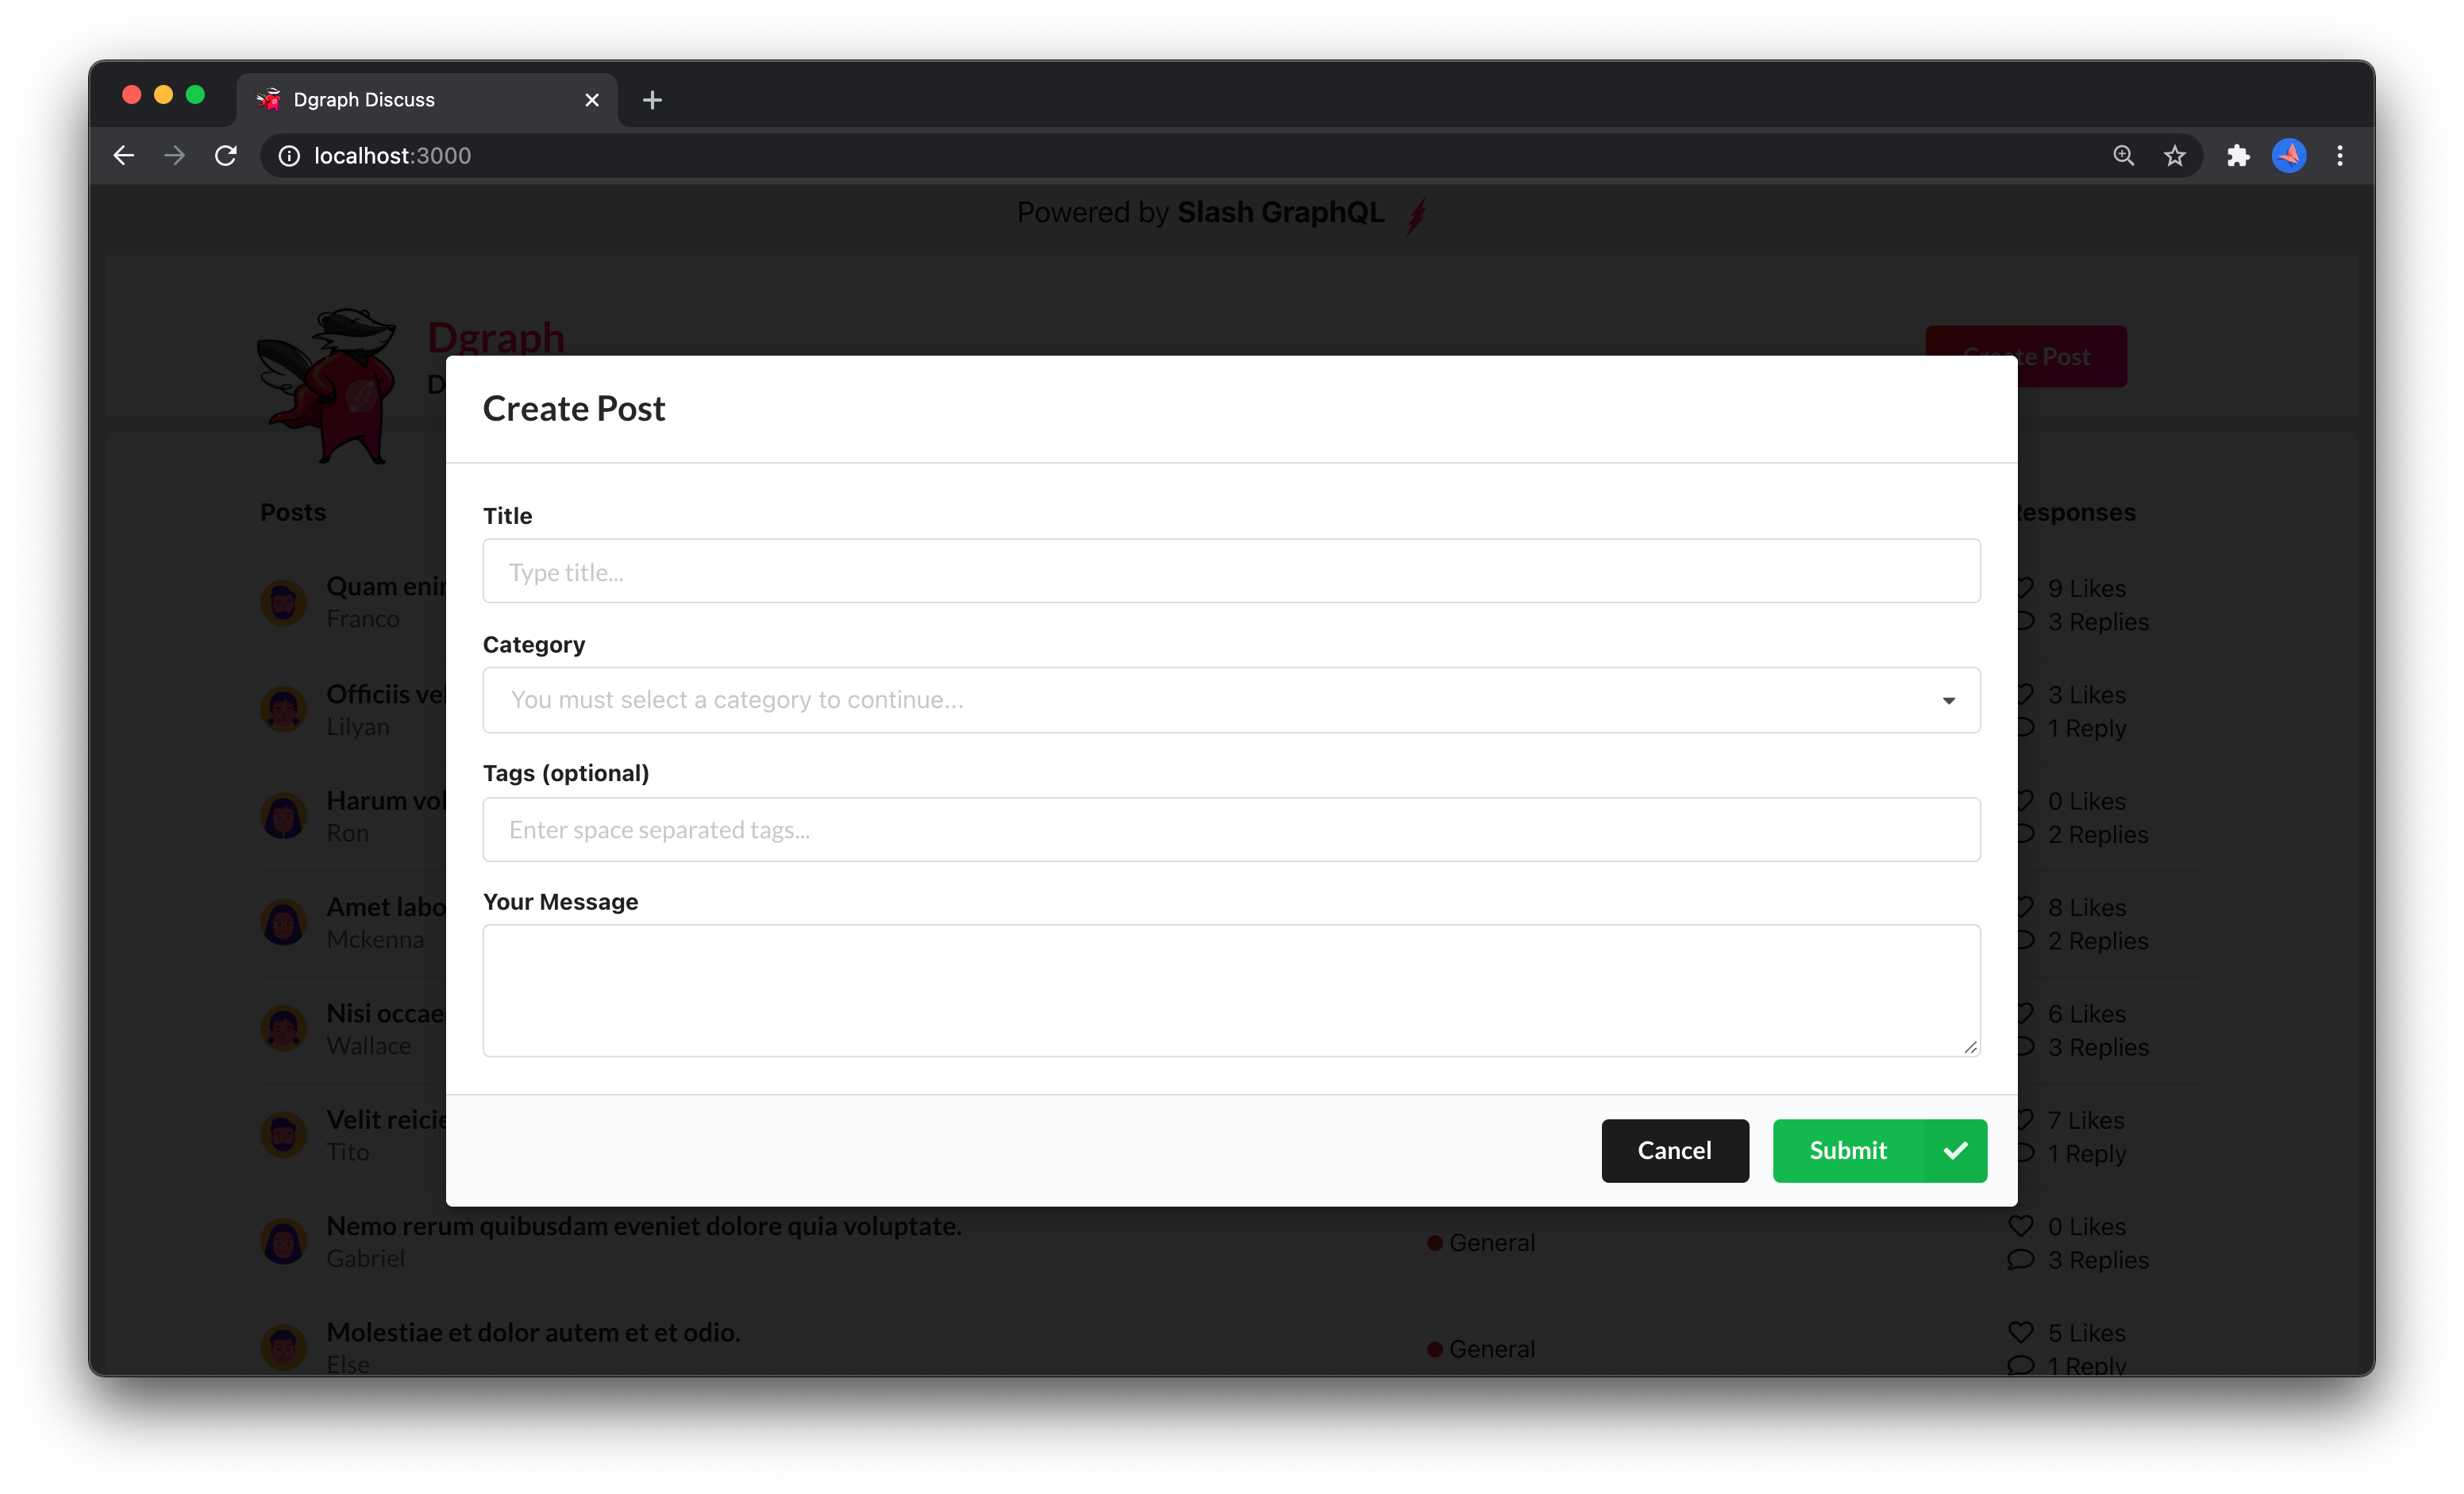
When clicked, this button brings up the modal to create the new post:

This Step in GitHub
This step is also available in the tutorial GitHub repo with the graphql-mutations tag and is this code diff.
You can run the app using the yarn start command, and then navigate to http://localhost:3000 to see the post list on the home screen. Then, you can click
Create Post to add a new post to the backend GraphQL database. After
submitting the post, you’ll see it in the post list.
The user the post is added for is hard-coded in this step (to “TestUser”).